
I get a lot of questions from followers who are looking to make the transition from hobby weekend bread bakers to a small cottage food operation. ( A cottage food operation is a licensed small business that is allowed to be conducted from a home kitchen). I thought I would go over a few of my recommendations on how to setup a workspace for baking at home. Keep in mind that my workspace as it is now has been built one piece at a time over the past 6 years. I started out baking in my home oven with 2 dutch ovens, using my kitchen table as a work surface. I didn’t have many resources so I had to slowly save aside the small profits from my tiny business and save up for each item, many of the larger equipment purchases were only in the past 2 years after 4 years of making do with a lot less, just something to keep in mind if it seems overwhelming at first. That said, lets jump into it!

My workspace in my home kitchen at Alchemy Bread
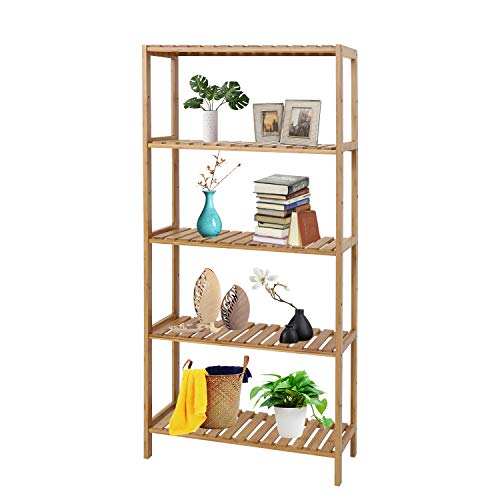
The absolute first purchase I would recommend is a work table that is the proper height for you to work on. I spent my whole first year working on a kitchen table before I had saved up enough to purchase a worktable. It makes a huge difference! Some bakers do work on stainless steel tables, but I very much prefer wood. I also chose this table because the bottom of the legs are slightly adjustable so I can set the height. There are a few different sizes so you can pick the one that fits your workspace, mine is 72 inches long. You can use the shelf in to store large (unopened) bags of flour there if space is at a premium.

Another question I get a lot is about flour storage. From the start of my cottage bakery I would buy my flour on a weekly basis, and only the amount that I needed for that week. Long term flour storage shouldn’t be necessary for a small operation. Even now with a very busy cottage operation, I go through about 150 pounds of flour a week. That’s only three 50 pound bags of flour (or six if you buy in 25 pound increments). If you have a small house like I do and space is at a premium, storing flour is best left to your restaurant supply store and not your kitchen! You do need to keep you flour stored at least 6 inches up from the floor. You can install the shelf under your table at this height. (You will notice as I’ve grown I’ve now added a second work table)

Unopened flour stored six inches from the floor in a table shelf. Also a great place to store a 5 year old.
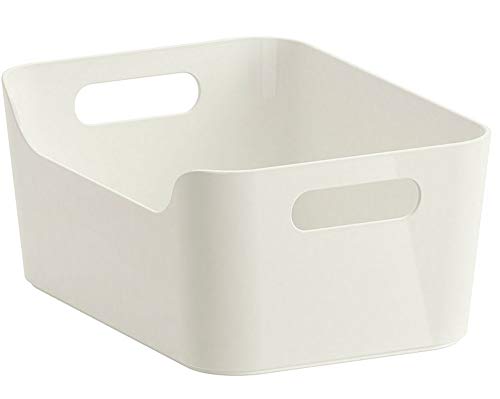
As you expand a product range and do more variety in your work you will need more storage space for small items ( chocolate chips, baking soda, vanilla, different varieties of grains and seeds) I have a small laundry room off of my kitchen, I got rid of my washer and dryer and sacrificed them for bakery storage. I do my wash at the laundromat so I could steal some more space for some shelving. Hopefully, you don’t have to do that! Here is the shelving that I use for my miscellaneous storage. Once again, there are assorted sizes to fit in a space, the shelves can be adjusted to different heights, and the plastic cambro tubs come in plenty of sizes and are stackable and should be used to hold nuts, seeds, and grains. I also use these tubs to hold my sourdough starter in. There are endless options for clear bins to keep small ingredients in. I keep things I will use together in the same bin, so I can just grab the whole bin out when I’m making cookies for example.


Bakery tools organized in bins in a shelf.
When you start out, you won’t likely have too many tools, but over time you will likely accrue a collection of tools and keeping them organized and separate from the rest of your kitchen implements is in your best interest. When time is of the essence, you don’t want to be rifling through a drawer full of nonsense searching for your pastry brush or your microplane. I have a simple wooden shelf from Ikea for this purpose, along with white plastic bins of varying sizes for all my tools. The one below is pretty similar. I prefer an attractive wood shelf in this case since it’s in my workspace.
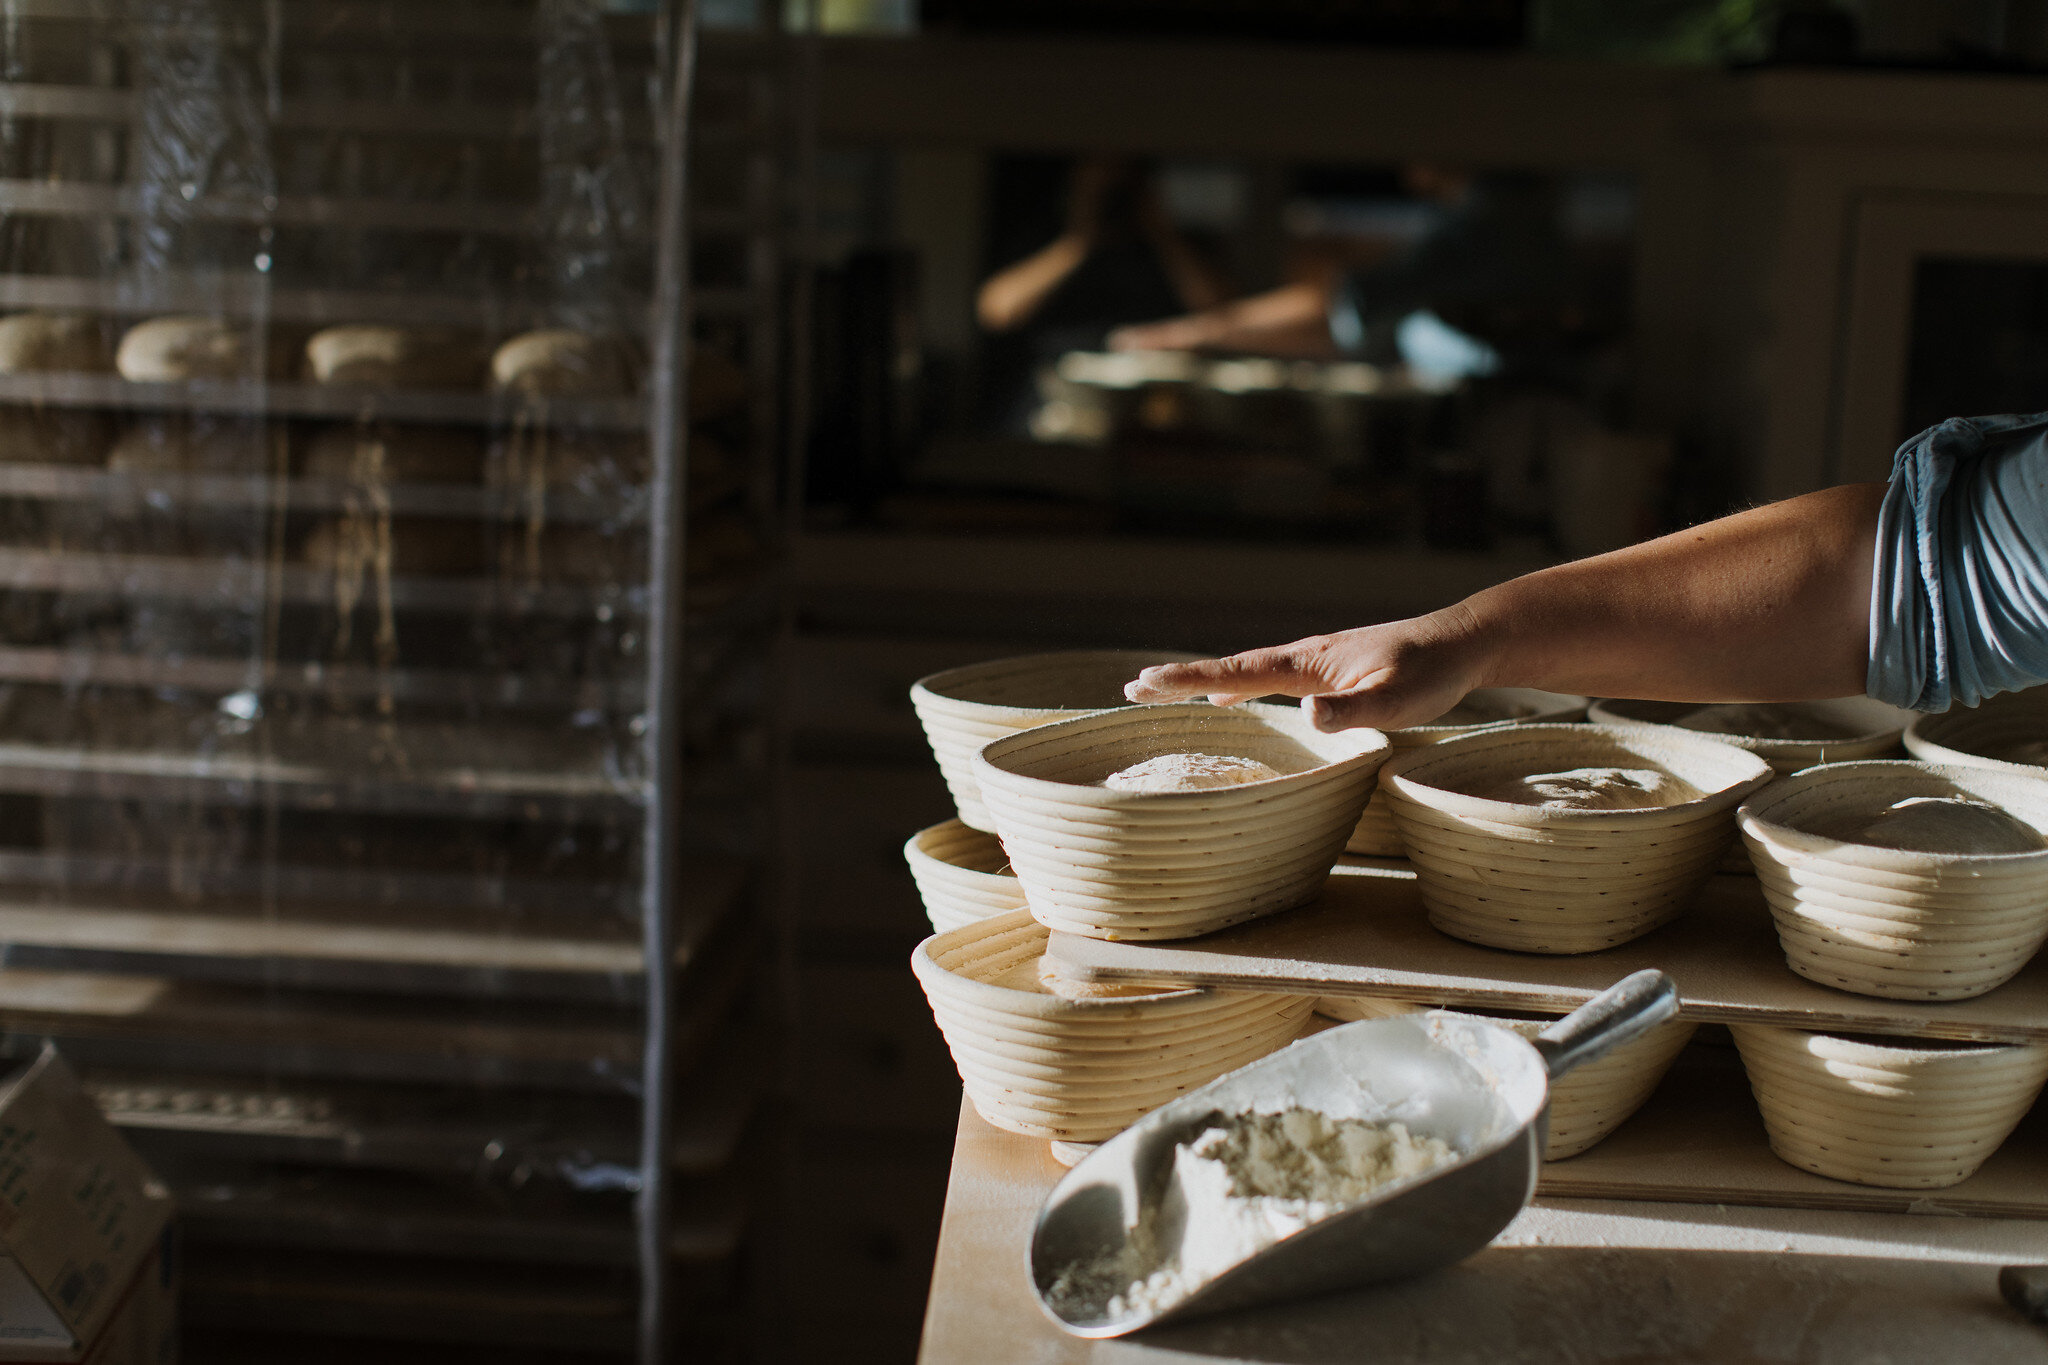
Baskets of dough proofing, and pre-shaped dough bench resting in a speed rack.
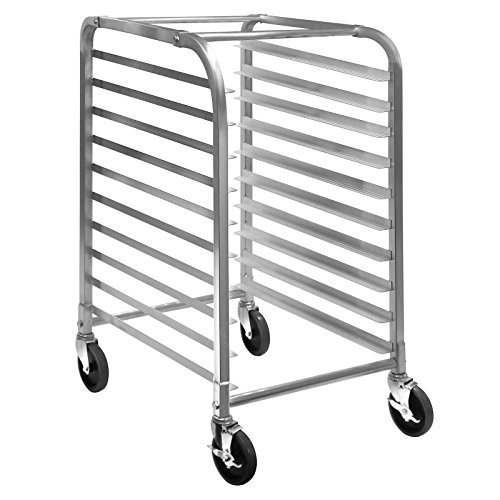
After creating a workspace and storing your ingredients, you will likely encounter your next problem. There is not enough horizontal space in any home environment to shape dough on, proof dough on, and load bread into the oven on, and eventually you will run out of places to put things and your workflow will start to become a game of tetris. When this happens, it’s time to get a baker’s rack, also called a speed rack, or sometimes called a bun rack. This will help alleviate the traffic jam in a small workspace. I have a tall version as you can see above, but a half sized rack that slides under your work table is a good place to start if you also don’t have much floor space. These can hold all kinds of things like hot sheet pans of cookies that need to cool, or proofing boards full of resting dough.
Of course, there is much more to be done in setting up a tiny home bakery (permits! licenses! fridge space! oh my!) however, I hope this is a serviceable start to sorting out some of the nuts and bolts. If you are just getting started baking bread and haven’t got the basics well in hand yet, I would recommend working through my book Bread Baking for Beginners. If you need more hands on help, I have an online class that can walk you through the whole first chapter and get your started confidently. If you need more equipment advice in the realm of small wares (bench knives, pastry brushes, baking pans etc.) you can find advice on all that on my materials list. You can find me and all my homebakery antics over on instagram @alchemybread